
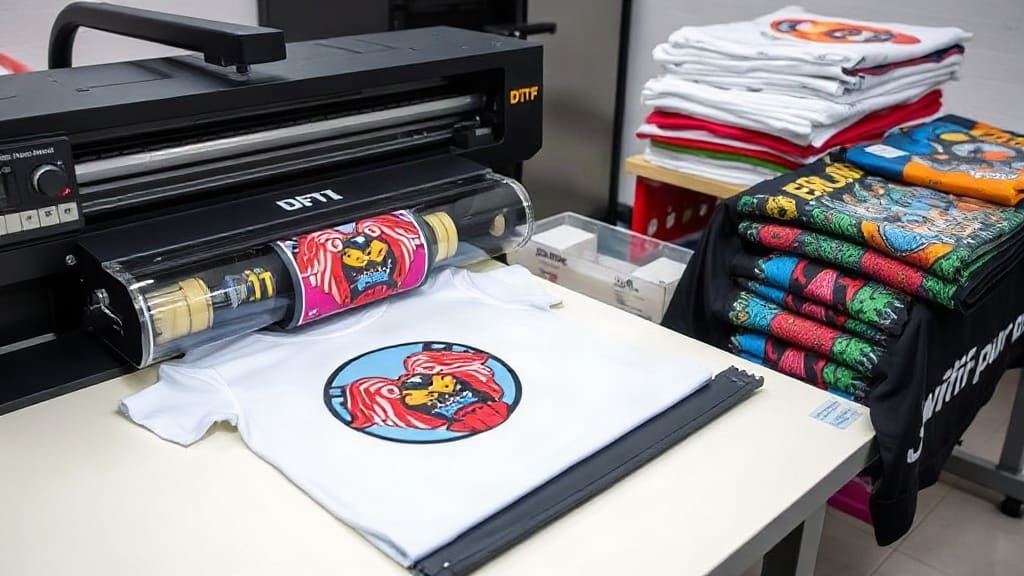
DTF transfers have revolutionized the custom apparel industry. If you're looking for a printing method that combines versatility, vibrant colors, and durability, you've likely heard of this game-changing technique. Whether you're a small business owner, a hobbyist, or a large-scale printer, understanding DTF transfers can open up a world of possibilities. In this comprehensive guide, we'll break down everything you need to know, from the basics to advanced tips, so you can make informed decisions and achieve stunning results.
What Are DTF Transfers?
DTF, which stands for Direct to Film, is a printing process where designs are printed onto a special PET film, coated with adhesive powder, and then heat-pressed onto fabric or other substrates. Unlike traditional screen printing or DTG (Direct to Garment), DTF transfers offer exceptional flexibility because the film can be printed in advance and applied as needed. This makes it ideal for on-demand orders, small batches, and complex designs with many colors.
The process involves a few key steps: printing the design with a DTF printer using specialized CMYK+White inks, applying a hot-melt adhesive powder to the wet ink, curing the powder, and then transferring the design onto the garment using a heat press. The result is a soft, stretchy, and highly detailed print that can rival other methods in terms of quality.
Why Choose DTF Transfers?
There are several reasons why DTF transfers have become so popular among printers and businesses.
Versatility Across Fabrics
One of the biggest advantages is the ability to print on a wide range of materials. Unlike DTG, which mostly works on 100% cotton or high-cotton blends, DTF transfers can be applied to cotton, polyester, nylon, blends, and even tricky surfaces like leather or canvas. This flexibility allows you to expand your product offerings without investing in multiple printing technologies.
Vibrant Colors and Fine Details
DTF printing uses a white ink base, which ensures that colors pop even on dark fabrics. The printer lays down a layer of white, then prints the color on top, resulting in bright, opaque designs. Additionally, the high resolution of DTF printers means that even fine details, such as small text and intricate graphics, are reproduced sharply. This makes DTF a preferred choice for logos and complex artwork.
Cost-Effective for Small Runs
If you're producing limited quantities or custom orders, DTF transfers are incredibly cost-effective. There are no setup costs like screens, and you can print only what you need, reducing waste. This is particularly beneficial for businesses that offer personalized products or have a wide variety of designs but low volume per design.
How to Use DTF Transfers: Step-by-Step
Using DTF transfers is a straightforward process, but it requires attention to detail to achieve perfect results. Here's a step-by-step guide to get you started.
Step 1: Prepare Your Artwork
Your design should be in high resolution (at least 300 DPI) and in a format that supports transparency, such as PNG. Make sure to separate any colors that need to be printed as white underbase. Most DTF printing software allows you to add a white layer automatically. If your design includes text, ensure it's converted to outlines or curves to avoid font issues.
Step 2: Print the Film
Load the PET film into your DTF printer, ensuring it's the correct type (usually one side is coated). Print the design using the DTF mode, which typically includes a white ink layer. After printing, the ink will be wet and needs to be covered with adhesive powder.
Step 3: Apply Adhesive Powder
While the ink is still wet, cover the entire printed area with hot-melt adhesive powder. Use a shaker to apply a generous, even layer, making sure all the ink is covered. Then, remove any excess powder by gently tapping the film or using a powder shaker that collects the excess for reuse.
Step 4: Cure the Powder
Place the film, powder side up, in a curing oven or use a heat press with a low temperature (around 160°C or 320°F) for about 30 seconds. The goal is to melt the powder slightly so it adheres to the ink. Be careful not to overheat, as this can cause the film to curl or the powder to become too sticky.
Step 5: Prepare the Garment
Pre-press your garment for a few seconds to remove moisture and wrinkles. Then place it flat on the heat press. Position the film, powder side down, onto the desired location on the garment. Use heat-resistant tape to hold it in place, if needed.
Step 6: Heat Press Transfer
Set your heat press to the recommended temperature and pressure. Typically, for DTF transfers, you'll press at around 150-160°C (300-320°F) with medium to firm pressure for 10-15 seconds. The exact time may vary based on your equipment and the fabric.
Step 7: Peel Off the Film
Allow the transfer to cool for a few seconds, then peel off the film. Some films are designed for hot peeling, but cold peeling is safer and often gives better results. If you notice any areas where the design didn't stick, you can re-press with a bit more time.
Tips for Perfect DTF Transfers
To get the best results from your DTF transfers, keep these pro tips in mind:
- Use a high-quality DTF printer: The printer is the heart of the process. Invest in a reliable model with good color accuracy and white ink handling.
- Calibrate your printer regularly: Ensure your prints are consistent by calibrating colors and checking nozzle health frequently.
- Choose the right film: Not all PET films are created equal. Look for a film that is compatible with your printer and offers good adhesion.
- Optimal powder application: Too much powder can cause a thick layer, while too little can lead to poor adhesion. Practice to find the sweet spot.
- Test your presses: Different fabrics require different temperatures and times. Always do a test press on a scrap piece to fine-tune your settings.
- Maintain your equipment: Regularly clean your printer heads and ensure your heat press is calibrated.
- Store films properly: Keep unused films in a cool, dry place to prevent curling or moisture absorption.
Common Mistakes to Avoid
Even experienced printers can make mistakes. Here are some pitfalls to avoid when working with DTF transfers:
- Using low-resolution images: This leads to blurry, pixelated prints. Always start with high-quality artwork.
- Insufficient powder: If you don't apply enough adhesive powder, the design may peel off after washing.
- Over-curing the powder: Overheating can cause the powder to melt too much and bleed, resulting in a rough texture.
- Pressing at the wrong temperature: Too low temperature won't activate the adhesive properly; too high can damage the fabric.
- Not pre-pressing garments: Moisture in the fabric can cause poor adhesion and even print defects.
- Peeling too early: If you peel while the transfer is too hot, you might pull away some of the design.
DTF Transfers vs. Other Printing Methods
Understanding how DTF transfers compare to other methods can help you decide if it's the right choice for your projects.
DTF vs. Screen Printing
Screen printing is excellent for large orders with simple designs and limited colors. However, it requires a significant setup cost and is not practical for small runs or highly detailed artwork. DTF transfers shine in these areas, offering versatility and lower upfront costs for small quantities.
DTF vs. DTG Printing
DTG printing is great for cotton garments with intricate designs, but it struggles with non-cotton fabrics and often requires pre-treatment. DTF transfers can print on a wider range of materials and are more flexible for on-demand production. Additionally, DTF films can be stored for future use, making them ideal for repeat orders.
DTF vs. Vinyl Heat Transfer
Vinyl heat transfer is limited to solid colors and simple designs, while DTF transfers can produce full-color, photorealistic prints. DTF also offers a softer feel compared to vinyl, which often has a plastic-like texture.
Applications and Use Cases
The versatility of DTF transfers makes it suitable for a myriad of applications:
- Custom apparel: T-shirts, hoodies, sweatshirts, and more for businesses or personal use.
- Sportswear: Team jerseys and uniforms with vibrant colors and numbers.
- Workwear: Durable prints for uniforms and safety vests.
- Bags and accessories: Tote bags, backpacks, aprons, and caps.
- Home textiles: Pillows, curtains, and tablecloths.
- Leather goods: Wallets, belts, or patches.
Frequently Asked Questions
Can DTF transfers be used on dark fabrics?
Yes, absolutely! Because DTF printing includes a white ink layer, the colors remain vivid and opaque on dark materials. This is one of the major advantages of DTF over other methods like sublimation.
How many washes can DTF transfers withstand?
With proper application and care, DTF transfers can withstand 40-60 washes or more. To maximize durability, wash garments inside out in cold water and avoid using bleach or harsh detergents. Tumble drying on low is also recommended.
What is the difference between hot and cold peel DTF films?
Hot peel films allow you to remove the film immediately after pressing, while cold peel films require you to wait until the transfer cools down. Cold peel generally provides a more matte finish and better durability, but hot peel can save time. The choice depends on your preference and the film's specifications.
Do I need special equipment for DTF transfers?
Yes, you'll need a DTF printer, which can be a modified inkjet printer or a dedicated DTF machine. Additionally, you'll need a heat press, a powder shaker, and a curing oven (or a heat press for curing). Many suppliers offer complete kits that include these essentials.
Can I use DTF transfers on 100% cotton?
Absolutely! DTF works on cotton, polyester, and blends. In fact, it's one of the few methods that performs well on both natural and synthetic fibers without requiring different processes.
Conclusion
DTF transfers have become a staple in the custom printing world, and for good reason. They offer unmatched versatility, ease of use, and high-quality results. Whether you're just starting out or looking to expand your capabilities, mastering DTF can elevate your printing game. By following the steps and tips outlined here, you'll be well on your way to producing stunning, durable prints that your customers will love. Don't be afraid to experiment and refine your process. Happy printing!