
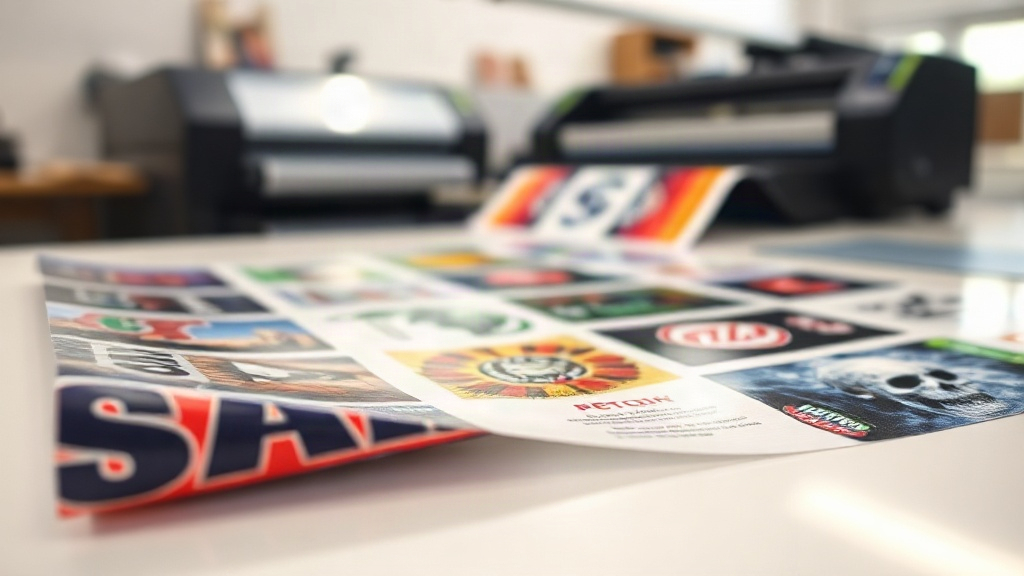
If you're in the custom apparel business, you've probably heard about DTF printing. It's a game-changer for producing vibrant, durable designs on various fabrics. But did you know that how you prepare your DTF transfers can make or break your efficiency? Enter the DTF gangsheet – a method that can dramatically speed up your production and cut costs. In this guide, we'll dive deep into DTF gangsheets, explaining what they are, why they matter, and how to use them like a pro. Whether you're a seasoned printer or just starting, mastering gangsheets will elevate your shop's output.
What is a DTF Gangsheet?
A DTF gangsheet is a single sheet of DTF transfer film that contains multiple designs arranged together. Instead of printing each design individually, you group them onto one sheet, maximizing the use of the film and reducing waste. Think of it as a digital collage of your artwork, ready to be printed in one go. The term "gang" refers to grouping multiple items together, and "sheet" is the transfer film itself. So, a gangsheet is essentially a batch print of DTF transfers.
Why does this matter? For starters, it saves time. You can print dozens of designs in one pass rather than feeding the printer repeatedly. It also saves money on film and ink, as you're using every inch of the sheet. Plus, it streamlines your workflow, allowing you to fulfill large orders faster. If you're running a print-on-demand or bulk apparel business, gangsheets are a must-have tool in your arsenal.
Benefits of Using DTF Gangsheets
Let's break down the advantages of incorporating DTF gangsheets into your production process.
Cost Efficiency
DTF film and ink aren't cheap. By arranging multiple designs on one sheet, you minimize wasted space. You can nest smaller designs around larger ones, ensuring you use as much of the film as possible. This reduces your cost per transfer, directly boosting your profit margin. For example, if you print a single large design, you might have leftover film that goes to waste. But with a gangsheet, you can fill that space with smaller logos or patterns.
Time Savings
Printing one sheet with many designs takes far less time than printing each design separately. You set up the printer once, hit print, and let it run. Then, you cure the entire sheet at once. This batch processing can cut your production time by half or more, especially for large orders. Time is money, and gangsheets give you more of both.
Consistency and Quality
When you print all designs on the same sheet, they go through the same printing and curing conditions. This ensures consistent color and quality across all transfers. If you print designs separately, you risk slight variations due to environmental factors or printer settings. Gangsheets eliminate that variability, giving you uniform results every time.
Scalability
If you land a big order – say, 100 shirts with different designs – gangsheets make it manageable. You can create multiple gangsheets, each holding a set of designs, and print them in batches. This scalability is essential for growing businesses.
How to Create a DTF Gangsheet
Creating a gangsheet requires some planning and the right tools. Here's a step-by-step guide.
1. Choose Your Designs
Select the designs you want to include. They can be a mix of sizes and shapes. Consider how they'll fit together. If you're printing for a specific order, group designs that will be used together. For example, if you have an order for 20 shirts with 5 different designs, you might create a gangsheet with multiple copies of each design.
2. Use Gangsheet Builder Software
Many DTF printers come with software or have online tools to help you arrange designs. Alternatively, you can use graphic design software like Photoshop or Illustrator. The key is to create a layout that maximizes space. Most gangsheet builders allow you to drag and drop designs, rotate them, and nest them tightly. Some advanced tools even auto-arrange for optimal use.
3. Set Up Your Printer
Load your DTF printer with the appropriate film. Make sure the film is the right size for your gangsheet – common widths are 13, 17, or 24 inches. Adjust your printer settings for the film type and design complexity. You'll want to use the correct ink profile and print mode (e.g., high quality for detailed designs).
4. Print and Cure
Once your gangsheet is ready, send it to the printer. After printing, you'll need to apply hot melt powder and cure the transfers. This step is crucial for durability. Use a heat press or conveyor dryer according to the powder and film manufacturer's instructions. Typically, curing is done at around 320°F for a few minutes.
5. Cut and Apply
After curing, cut out each design. You can use scissors or a cutting machine. Then, apply the transfers to your garments using a heat press. Follow the recommended time, temperature, and pressure for DTF transfers, usually around 300-320°F for 10-15 seconds.
Best Practices for DTF Gangsheets
To get the most out of your gangsheets, keep these tips in mind.
- Plan your layout: Use software to preview and adjust before printing. Leave a small gap between designs to make cutting easier.
- Consider the grain: If your designs have text, ensure they are oriented correctly. Gangsheets are printed on a roll, so orientation matters.
- Test first: Before printing a full gangsheet, do a small test print to check colors and alignment.
- Keep records: Note which designs you grouped and the settings used. This helps replicate successful gangsheets.
- Stay organized: Label your gangsheets and store them properly to avoid confusion.
Common Mistakes to Avoid
Even experienced printers can slip up. Watch out for these pitfalls.
- Overcrowding: Packing too many designs can lead to cutting errors or overlapping. Leave some breathing room.
- Ignoring film width: Make sure your layout fits within the printable area of your film. Otherwise, designs may be cut off.
- Inconsistent curing: If the sheet is too large, curing might be uneven. Ensure your heat source covers the entire sheet uniformly.
- Forgetting mirroring: DTF transfers are printed in reverse. If your design has text, mirror it in the layout so it reads correctly when applied.
Frequently Asked Questions
What is the maximum size for a DTF gangsheet?
The maximum size depends on your printer and film width. Common film widths are 13", 17", and 24". The length can be as long as your printer allows, often up to several feet. Check your printer's specifications for exact limits.
Can I reuse a DTF gangsheet?
No, DTF transfers are single-use. Once you apply a design to a garment, the transfer is spent. However, you can print multiple copies of the same gangsheet to use later.
How do I price products made with DTF gangsheets?
Calculate your cost per transfer by dividing the total cost of the gangsheet (film, ink, powder, labor) by the number of designs. Then add your desired profit margin. Gangsheets typically lower your cost per transfer, allowing competitive pricing.
Is a DTF gangsheet suitable for small orders?
Absolutely. Even for a few designs, gangsheets can save time and materials. If you have multiple small designs, grouping them is more efficient than printing individually.
What software do you recommend for creating gangsheets?
Many DTF printer manufacturers provide free gangsheet builder software. Alternatively, Adobe Photoshop or Illustrator works well. Some online tools like Gangsheet Builder are also popular. Choose one that fits your workflow and budget.
Mastering DTF gangsheets is a skill that pays off. By optimizing your layout, you reduce waste, save time, and increase profits. Start experimenting with gangsheets today and watch your production soar. For more tips and tools, visit dtfstudiopro.com.